Steps that differ between platforms switch automatically. Everything else applies to both.
Requirements
Your homebase. You build the scene here — geometry, perspective, camera, composition. Everything that defines where things are. RAY-L lives inside Blender as a panel in the Render Properties (the camera icon in the Properties Editor).
An installer and launcher for local AI tools. Getting ComfyUI running without it means dealing with Python environments, dependency conflicts, and a lot of Terminal or PowerShell troubleshooting — not a fun afternoon, and on Windows it bundles its own Python even if you have none installed system-wide. Stability Matrix handles all of that: it installs ComfyUI with a single click, manages model folders, and keeps everything up to date. During daily work you don't interact with it directly — you just launch ComfyUI from it and let it run in the background.
The local engine that runs the image models on your machine. It receives the render from Blender, computes the Canny edge map, runs the model and sends the result back. RAY-L communicates with ComfyUI via a local API at 127.0.0.1:8188 — no cloud, no data leaving your machine.
The SDXL model — the quickest way to a first result. 6.6 GB, works on 16 GB of memory, specialized in photorealistic output. RAY-L supports SDXL and the Flux.1 family side by side; you switch between them with the SDXL / Flux.1 toggle at the top of the panel.
Optional, and a clear step up from SDXL. Both are 12B models of the same architecture and understand natural language prompts — no keyword lists required. Flux.1 Krea dev is post-trained for a more photographic look with less of the typical AI aesthetic. They share text encoders, VAE and ControlNet, so switching between them means changing one filename in the panel. Wants 32 GB+ of memory to be practical (unified memory on Apple Silicon, system RAM on Windows) — see section 07.
This is what makes RAY-L fundamentally different from just prompting an AI. Without ControlNet, the model ignores your Blender geometry and generates whatever it wants. ComfyUI extracts the edge structure from your render with a Canny algorithm — every wall, corner and silhouette — and ControlNet forces the model to stay within that structure. Your composition stays exactly as you defined it in Blender. Materials, light and atmosphere come from the prompt.
The bridge — in both directions. RAY-L sits in Blender's Render Properties: it reads the Render Result, fills the ComfyUI workflow with your render, prompts and settings, sends it off, and displays the result back in the Blender Image Editor. In the other direction, workflows you extend in ComfyUI load back into the panel as an external workflow (section 08). Canny edge detection runs inside ComfyUI, so there's nothing to install into Blender's Python. You never leave Blender.
System
macOS · Apple Silicon
M1 / M2 / M3 / M4 — 16 GB (SDXL) / 32 GB+ (Flux.1)
System
Windows 10 / 11 · NVIDIA GPU
CUDA required (AMD/Intel not supported) — 8 GB VRAM minimum, 32 GB system RAM recommended
Drive
NTFS, ≥ 50 GB free
FAT32 does not work — no junction support, 4 GB file size limit
Disk space
~12 GB (SDXL) / ~40 GB (Flux.1)
ComfyUI + models · +24 GB for each additional Flux.1 model
SDXL model
Juggernaut XL Ragnarok
~6.6 GB · 16 GB RAM
and / or
Flux.1 dev · Flux.1 Krea dev
~23.8 GB each · 32 GB+ RAM
ControlNet SDXL
controlnet-canny-sdxl
~2.3 GB · safetensors
ControlNet Flux.1
flux-canny-instantx
~3.6 GB · safetensors · for dev and Krea
Performance note — macOS
On a MacBook Air with 16 GB, expect 15–30 minutes per render at 1024×1024 with SDXL. For quick feedback during setup, work at 512×512 or 768×768. A MacBook Pro with 64 GB reduces render times significantly.
Performance note — Windows
On an 8 GB VRAM card (e.g. RTX 2070) with 32 GB system RAM, expect roughly 1–2 minutes per render with SDXL + ControlNet, and around 10 minutes with Flux.1 dev — ComfyUI offloads what doesn't fit in VRAM to system RAM automatically. Newer NVIDIA cards with more VRAM will be noticeably faster. 16 GB system RAM has not been validated and will likely make offloading too tight to be practical.
Install Blender
Get Blender from blender.org — not the Microsoft Store
The Microsoft Store version of Blender runs sandboxed with restricted file system access — exactly the environment where an add-on that writes files and talks to a local server fails in confusing ways. Always use the installer or portable ZIP from blender.org.
Download Blender
Go to blender.org/download and download version 5.0 or newer for macOS Apple Silicon. 5.2 LTS is recommended. RAY-L doesn't depend on a specific Python version, so newer Blender releases work fine.
Move to Applications
Drag Blender.app into your /Applications folder — the standard location on macOS. That's the whole Blender-side setup: RAY-L installs as a normal add-on later (section 04), with nothing to add to Blender's Python.
Download Blender
Go to blender.org/download and download version 5.0 or newer for Windows (installer or portable ZIP). 5.2 LTS is recommended. RAY-L doesn't depend on a specific Python version, so newer Blender releases work fine.
Extract before you run it
If you downloaded the portable ZIP, extract it fully first (right-click → Extract All) — don't launch the .exe from inside the ZIP. Choose a folder you'll remember, not Downloads.
Install ComfyUI via Stability Matrix
Stability Matrix is the easiest way to install and manage ComfyUI on macOS. It handles dependencies, model folders and updates — no manual Python environment setup required.
Stability Matrix is the easiest way to install and manage ComfyUI on Windows — it bundles its own Python, so there's no manual environment or PATH setup, even if you have neither Python nor Git installed system-wide.
Download Stability Matrix
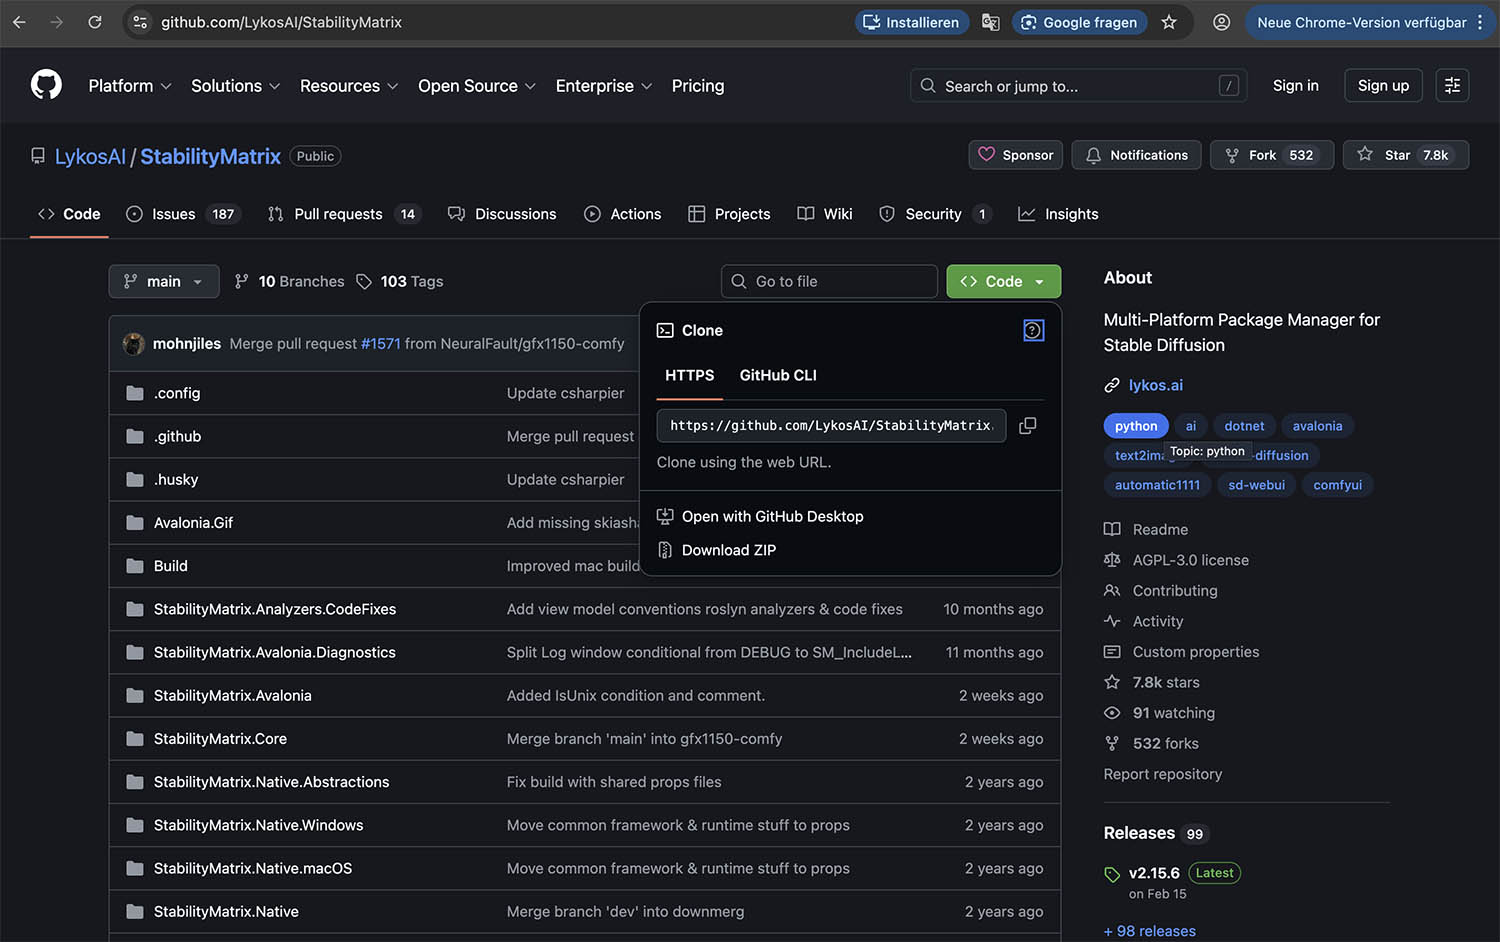
Go to github.com/LykosAI/StabilityMatrix and download the latest macOS release. Open the DMG and move the app to your Applications folder.
Download and extract Stability Matrix
Go to github.com/LykosAI/StabilityMatrix and download the latest Windows release (ZIP).
Extract before running
Windows lets you start the .exe directly from inside the ZIP — Stability Matrix will refuse with "please extract the app from the zip file before running Stability Matrix". Right-click → Extract All into a folder you choose deliberately (not Downloads, where it tends to get deleted by accident later).
Check free space per drive, not just overall
Windows Explorer tends to highlight whichever drive has the most free space — your system drive can still be full underneath. Check every drive explicitly in PowerShell:
Stability Matrix defaults its data directory to C:. If that drive is tight, it fails during install with "Not enough space to download ComfyUI … need at least 5GB" — point it at a roomier drive in the next step instead.
Verify the drive is NTFS
Stability Matrix links files between folders using NTFS junctions — these don't exist on FAT32. Older external or secondary drives are often still FAT32. Check before you commit to a location:
FAT32 also can't hold files over 4 GB — SDXL checkpoints (~7 GB) and Flux.1 models will fail to write. Network drives (SMB) don't work either, since models would be re-read over the network on every image. Pick a local NTFS drive with at least 50 GB free.
Install ComfyUI as a package
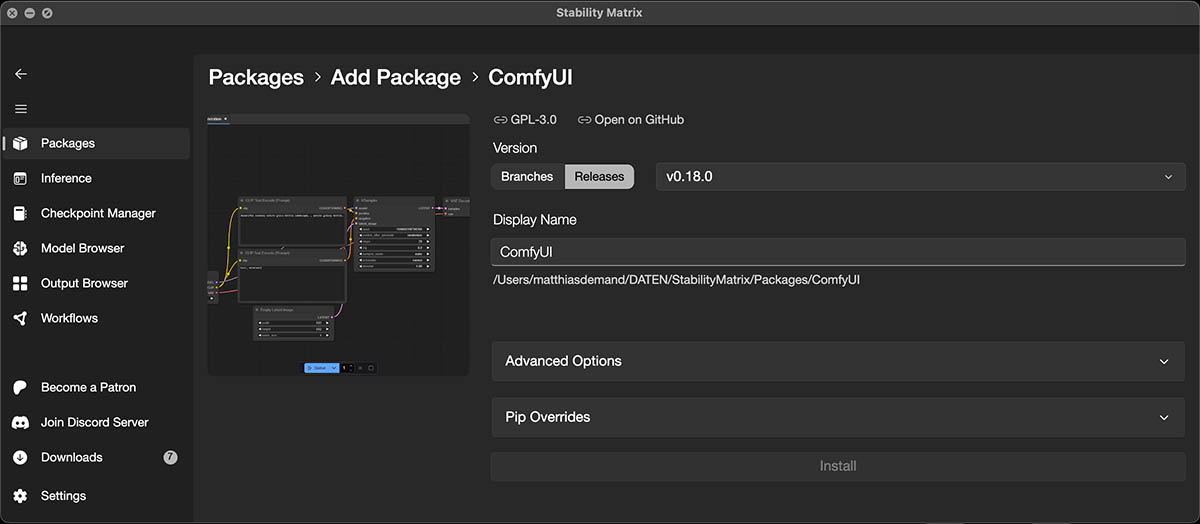
Launch Stability Matrix. On first run it will ask where to store data — choose a location with enough disk space (at least 15 GB free, ideally 40 GB+). Then click Add Package → ComfyUI → Install.
Launch Stability Matrix. On first run it will ask where to store data — point it at the NTFS drive you just verified. Then click Add Package → ComfyUI → Install.
Important — skip the model selection
Stability Matrix may offer to download a starter model during installation. Skip this step and click Close. We will download the models manually in the next section so we know exactly where they are placed.
If a previous attempt was interrupted
Stability Matrix links Packages/<Package>/output to Images/Text2Img via an NTFS junction. If an earlier install was aborted, a real output folder can be left behind — Windows can't create a junction over an existing folder, and you'll see "Unable to create junction point". Delete the leftover output folder and try the install again.
Start ComfyUI and verify it's running
Click Launch in Stability Matrix. After a moment, ComfyUI's web interface opens in your browser at 127.0.0.1:8188. Leave this running whenever you use RAY-L — it must be active in the background.
Note the model folder path
Stability Matrix stores everything in the folder you chose during setup. The exact path depends on where you installed it — for example ~/Documents/StabilityMatrix/ or a custom location. Inside that folder, ComfyUI's model directory is at:
Stability Matrix stores everything in the folder you chose during setup — for example R:\StabilityMatrix\. Inside that folder, ComfyUI's model directory is at:
Note this path — you will need it in the next step to place the model files in the correct subfolders.
Download Models — SDXL
Two models are required for SDXL — the quickest way to a first result. Flux.1 dev and Flux.1 Krea dev need additional files, see section 07. Place all files in the correct subfolders inside your ComfyUI models directory.
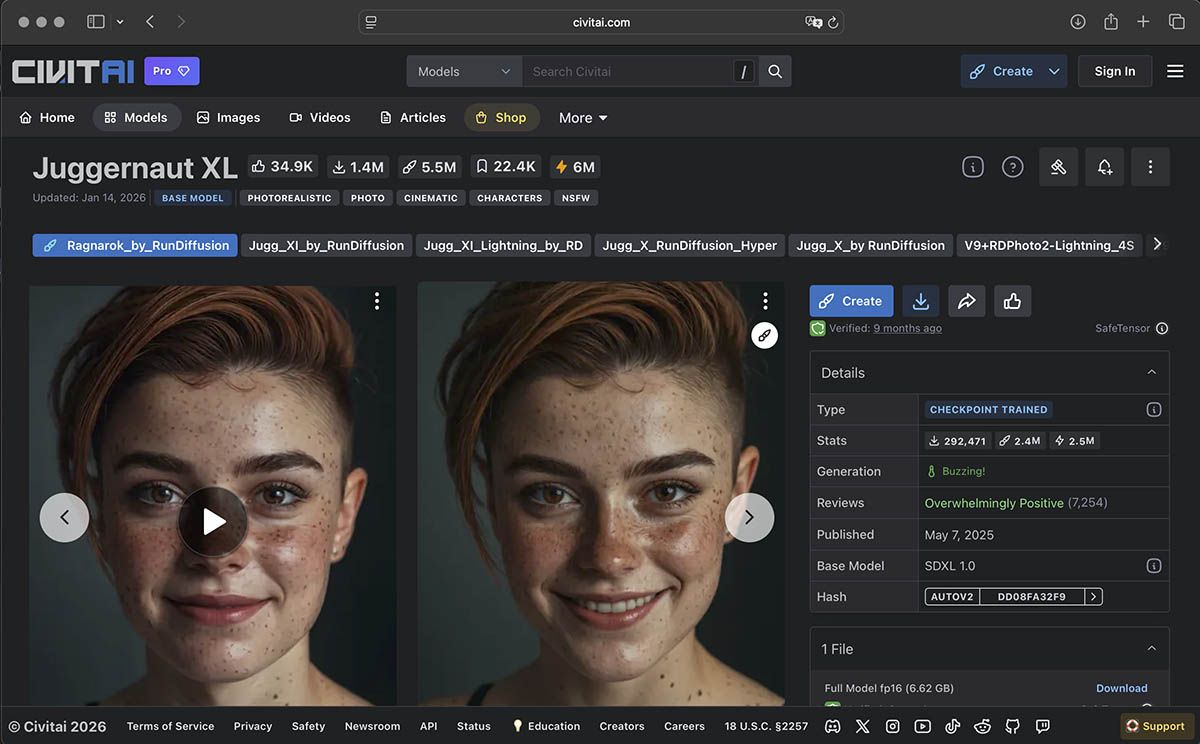
Checkpoint — Juggernaut XL Ragnarok
This is the image generation model. Download juggernautXL_ragnarokBy.safetensors (~6.6 GB) from Civitai and place it in:
If your download has a different filename
Civitai, a manual download, or Hugging Face can each name the file slightly differently. You don't need to rename it: in SDXL mode, the RAY-L panel has a Checkpoint field right below the ControlNet settings. Enter the filename you actually have there.
ControlNet — Canny SDXL
This model locks SDXL to your Blender geometry — it is what makes RAY-L work. Without it, the model ignores your geometry and generates freely.
How to download from Hugging Face:
① Go to huggingface.co/xinsir/controlnet-canny-sdxl-1.0
② Click the "Files and versions" tab at the top of the page
③ You will see two versions (V1 and V2) — download V1
④ Click the download arrow on the right side of the row for diffusion_pytorch_model.safetensors
Rename the file — or use the panel's field instead
The file downloads as diffusion_pytorch_model.safetensors. This guide assumes you rename it to controlnet-canny-sdxl.safetensors before placing it in the models folder. In Finder: click the file once, press Return, type the new name, press Return again.In Explorer: click the file once, press F2, type the new name, press Enter. If you'd rather keep the original filename, that's fine too — enter it in the Model field of the RAY-L panel (SDXL mode, next to Checkpoint).
Place the file in:
If the controlnet subfolder does not exist, create it.
Restart ComfyUI
After placing both files, restart ComfyUI from Stability Matrix so the models are recognized. You can verify they appear in ComfyUI's model dropdown when you open the web interface at 127.0.0.1:8188.
Install the RAY-L Add-on
Download RAY-L
Download RAY-L from Gumroad (free — pay what you want). Don't unzip the file — Blender installs directly from the ZIP. The same ZIP works on both macOS and Windows.
Install in Blender
Open Blender → Edit → Preferences → Add-ons, open the drop-down menu at the top right and choose Install from Disk. Navigate to the downloaded ZIP and confirm. The add-on RAY-L will appear in the list.
Always install through this dialog
Don't copy the add-on files into Blender's folders by hand. RAY-L is a classic add-on (shown as Legacy (User)), not a packaged extension — dropped manually into %AppData%\Blender Foundation\Blender\5.x\extensions\user_default\, Blender looks for an extension manifest and fails with "Unable to parse the manifest", or doesn't pick the add-on up at all. Install from Disk puts it in the right place automatically. And as covered in section 01: this only works reliably with a blender.org build of Blender, not the Microsoft Store version.
Enable the add-on
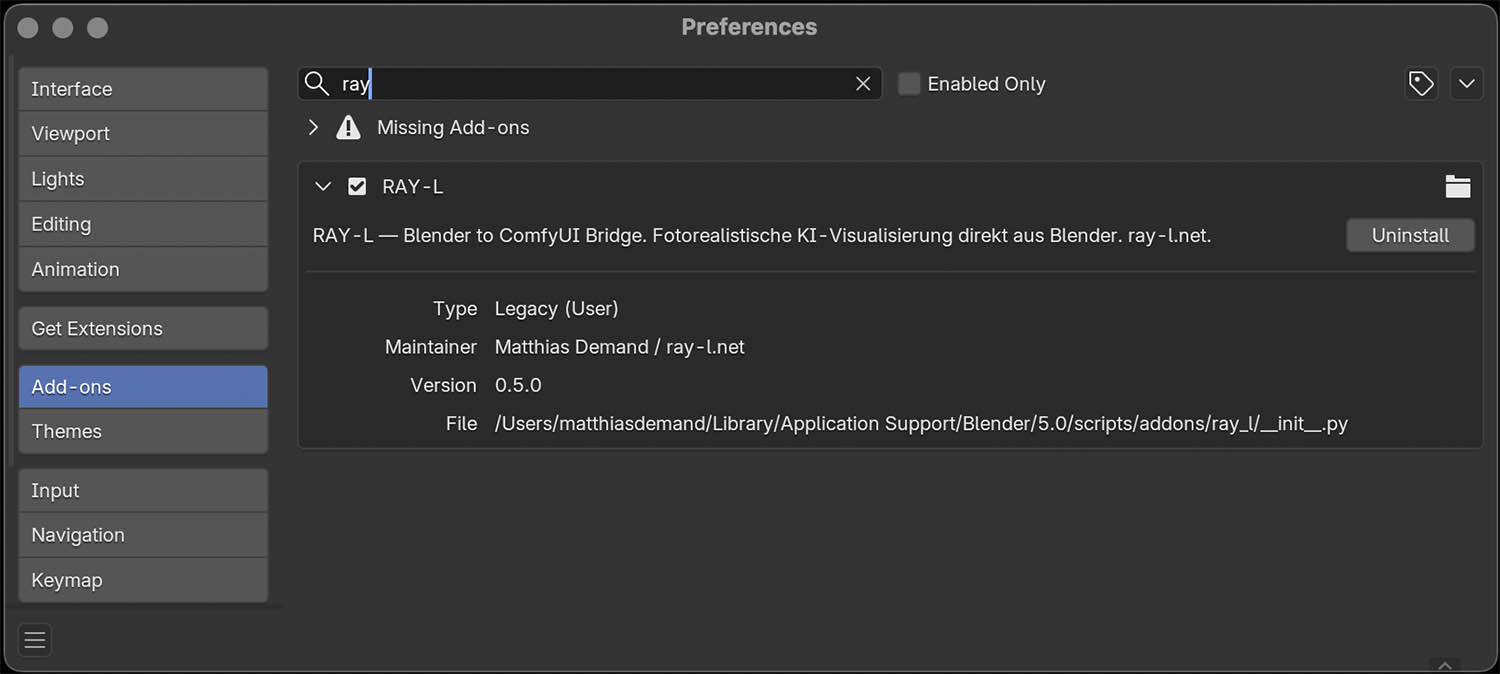
Check the checkbox next to RAY-L to activate it. Expand the entry with the arrow to check the details: it should read Version 0.9.0 and Type Legacy (User). The RAY-L · v0.9 panel will now appear in Blender's Render Properties — the camera icon in the Properties Editor on the right side.
Verify the connection
Make sure ComfyUI is running. At the bottom of the RAY-L panel, open Server, check that the URL reads http://127.0.0.1:8188 and click Test connection. The status line at the top of the panel shows the result. If the connection fails, check that ComfyUI is active in Stability Matrix.
Your First Render
The daily workflow is four steps. Always follow this exact order.
Render your scene — F12
Press F12 to render with Cycles or EEVEE. Wait until the render is complete before moving to the next step. For a first test, keep resolution at 512×512 to keep waiting time short.
Save as Reference — Button ①
In the RAY-L panel, click ① Save as Reference. This saves the current Render Result as input for ComfyUI.
Check the Canny thresholds
Under img2img Settings → Canny thresholds, set Low and High for the edge detection. The values use the familiar 0–255 scale; RAY-L passes them to ComfyUI's Canny node, which does the actual edge extraction. The defaults work well for most scenes:
For clean architectural geometry, keep the defaults. If your render has fine surface detail (wood grain, fabric), raise Low to 80–100 to suppress noise. If important edges are missing, lower High to 100–120.
Send to ComfyUI — Button ②
Click ② Reference → ComfyUI. RAY-L sends the render to ComfyUI, which extracts the Canny edges and runs the model with ControlNet. The result appears automatically in the Blender Image Editor when done.
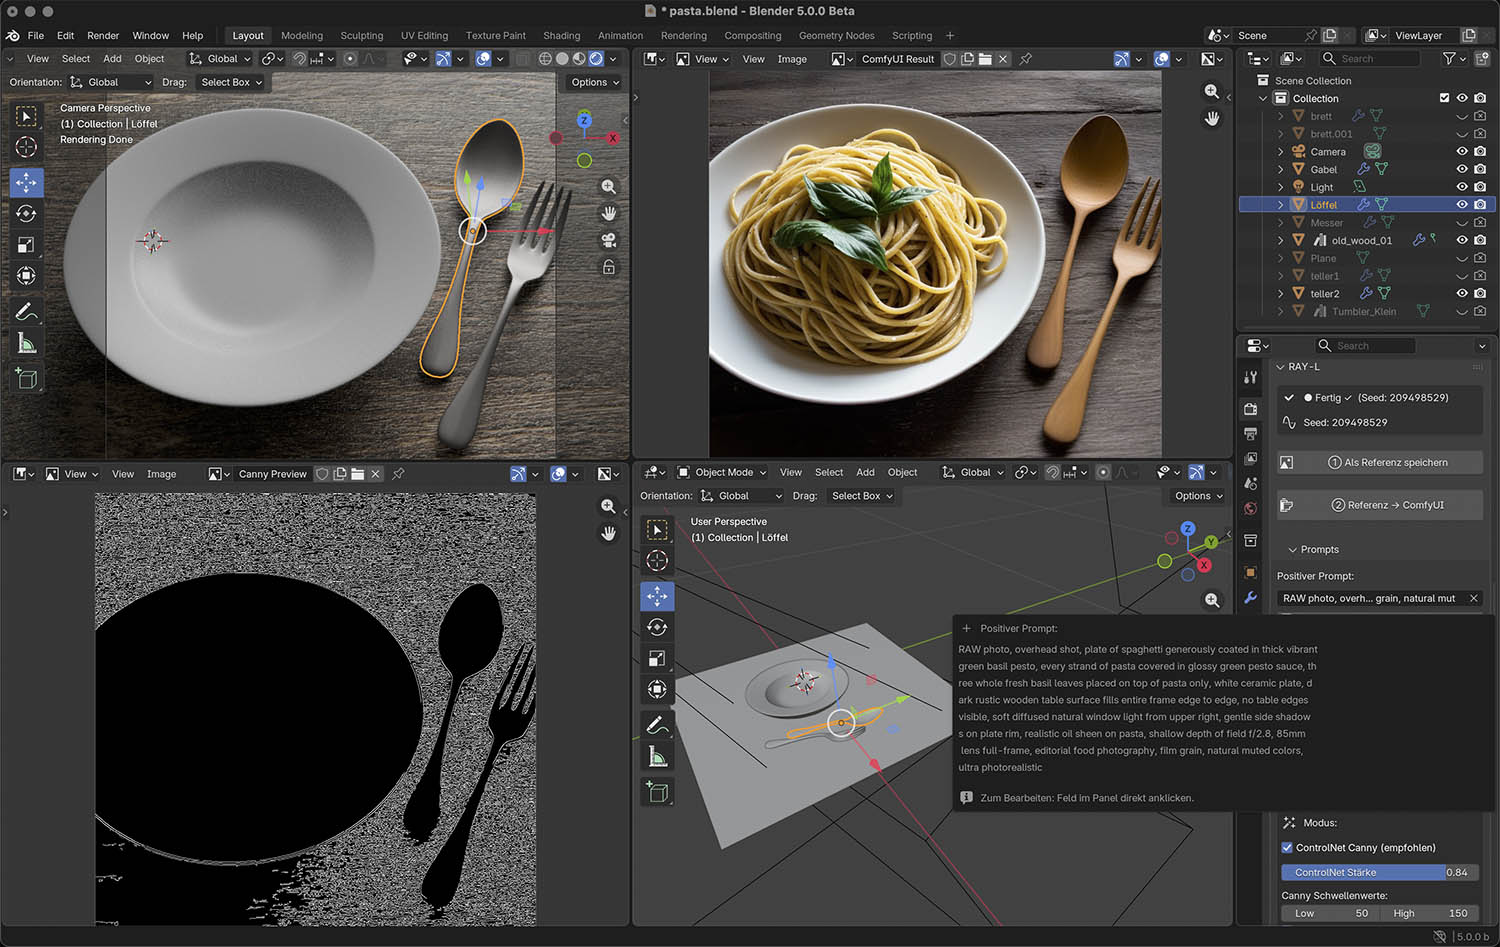
Check the result — and the Canny preview
Tick Load Canny preview (after render) under img2img Settings, and RAY-L also loads the edge map ComfyUI computed. Since that happens inside ComfyUI, the preview comes back with the result rather than before it. Pick Canny Preview from the image dropdown in the Blender Image Editor to see exactly which edges reached ControlNet. Edges should be clean and clearly defined. Heavy noise means the render has too much texture detail at low resolution — try a slightly higher resolution, or raise Low. Missing edges in shadow areas usually mean too little local contrast across the edge, not a threshold problem — light the scene so edges stand out from the surface behind them. That is what lighting in Blender is for in this workflow: it shapes the edge map, not the mood of the final image. The mood comes from the prompt.
Important — what gets sent
② always sends what is currently in Blender's Render Result. Normally the AI result is loaded as a separate image (ComfyUI Result), so your render stays untouched. But if Save result as Render Result is ticked (section 06), the AI result replaces the Render Result — press F12 again before the next ②, or you'll send the AI image back in as reference.
Key Settings Explained
These are the parameters you'll adjust most often. Start with the defaults, then tune from there.
| Parameter | Default | What it does |
|---|---|---|
| ControlNet Strength | 0.90 | How strongly Blender geometry controls the result. 1.0 = exact geometry, 0.5 = loose suggestion. 0.7–0.95 is the useful range — start high and lower it if the result looks too locked to the render. |
| Canny Low | 50 | Lower threshold for edge detection. Lower = more edges captured. Keep at 50 for most scenes. |
| Canny High | 150 | Upper threshold. Higher = only main structural edges. Raise if the edge map looks noisy. |
| Steps | 25 | More steps = better quality, longer render time. Use 10 steps for fast tests during setup. Flux.1 Krea dev needs more — see section 07. |
| CFG Scale | 7.0 | SDXL only. How strictly the prompt is followed. Above 10 often looks artificial. 7.0 is a reliable starting point. |
| Guidance | 3.5 | Flux.1 only, replaces CFG Scale. 3.5 for Flux.1 dev, 4.0 for Flux.1 Krea dev. |
| Seed | Random | With Random ticked, every run gets a new seed. Untick it to fix the seed — the same settings then reproduce the same result. The seed of the last render always shows in the status line at the top of the panel, so you can copy a good one into the Seed field. |
| Output size | From render settings | Taken from Blender's Render Properties; the panel shows the resulting size. Keep at 512×512 or 768×768 on entry-level hardware (16 GB unified memory / 8 GB VRAM) for practical render times. |
| Save result as Render Result | Off | Off: the AI result is loaded as a separate image, ComfyUI Result, and your render stays untouched. On: the result replaces Blender's Render Result — handy for saving it like a normal render, but press F12 again before the next send. |
Prompt structure that works well for photorealistic architecture with SDXL:
Leave perspective out of the prompt
In a RAY-L workflow, angle of view and camera position are fixed in Blender — they reach the model through the edge map. Don't describe them again in the prompt: no focal lengths such as 35mm or 85mm, no wide angle, close-up or shot from above. Such terms compete with the geometry from Blender instead of adding to it. A camera or film look (e.g. Canon EOS R5) is fine — it describes the rendering, not the perspective.
Sampler
The tested and recommended sampler for SDXL is Euler Ancestral with 25 steps and CFG 7.0. This combination is what the Juggernaut XL Ragnarok model was optimized for.
Flux.1 dev & Flux.1 Krea dev — Optional Upgrade
Flux.1 dev and Flux.1 Krea dev are newer and more capable than SDXL. They produce higher quality photorealistic results and understand natural language prompts — no keyword lists required. Both are 12B models with the same architecture: Krea is a post-trained variant of dev with a more photographic look and less of the typical AI aesthetic. They share text encoders, VAE and ControlNet, so you can install one or both — switching between them means changing a single filename in the panel.
This section covers the full-size models. Smaller quantized (GGUF) versions for machines with less memory follow with RAY-L v0.9.1.
Hardware requirement — macOS
Flux.1 dev and Flux.1 Krea dev require at least 32 GB of unified memory for practical use. On a MacBook Air with 16 GB, they will fail with an out-of-memory error. A MacBook Pro or Mac Studio with 64 GB is recommended.
Hardware requirement — Windows
Flux.1 dev has run successfully on as little as 8 GB VRAM (RTX 2070) with 32 GB system RAM — but expect roughly 10 minutes per image: ComfyUI offloads whatever doesn't fit in VRAM to system RAM, which works but isn't fast. It's usable, not comfortable. More VRAM shortens this considerably. 16 GB system RAM has not been tested and will likely make offloading impractical. Flux.1 Krea dev has the same size and memory needs.
~23.8 GB · Place in models/unet/ · Requires Hugging Face account and license agreement
~23.8 GB · Same folder: models/unet/ · Requires Hugging Face account and license agreement
~9.6 GB · Place in models/text_encoders/ · the fp16 version, for dev and Krea
~235 MB · Place in models/clip/
~335 MB · Place in models/vae/ · Requires Hugging Face login
~3.6 GB · Place in models/controlnet/ · Rename after download · works for dev and Krea
Create a Hugging Face account and accept the licenses
Go to huggingface.co and create a free account. Then visit huggingface.co/black-forest-labs/FLUX.1-dev and click "Agree and access repository" to accept the license terms. For Krea, do the same at huggingface.co/black-forest-labs/FLUX.1-Krea-dev. Without this, the downloads will be blocked.
After accepting, go to huggingface.co/settings/tokens, create a new token with Read access, and keep it ready for the download step.
Token security
Never share your Hugging Face token publicly. After downloading, delete or regenerate the token at huggingface.co/settings/tokens.
Download the main model — dev, Krea or both (~23.8 GB each)
For Flux.1 dev: huggingface.co/black-forest-labs/FLUX.1-dev → Files and versions → flux1-dev.safetensors.
For Flux.1 Krea dev: huggingface.co/black-forest-labs/FLUX.1-Krea-dev → Files and versions → flux1-krea-dev.safetensors.
Both go into the same folder:
Each download takes 1–3 hours depending on your connection speed.
Download T5 Text Encoder and CLIP (~9.8 GB total)
Go to huggingface.co/comfyanonymous/flux_text_encoders → Files and versions and download both files. They are needed once — dev and Krea use the same encoders.
① t5xxl_fp16.safetensors → place in models/text_encoders/
② clip_l.safetensors → place in models/clip/
Take the fp16 version
The repository also contains smaller fp8 versions of the T5 encoder. Don't use them with this guide — fp8 does not run on Apple Silicon, and this setup is tested with fp16 only. Smaller quantized setups for machines with less memory follow with RAY-L v0.9.1.
Download the Flux VAE (~335 MB)
Go to huggingface.co/black-forest-labs/FLUX.1-dev → Files and versions → download ae.safetensors. Place it in:
This file requires Hugging Face login — make sure you are signed in. Krea uses the same VAE.
Download Flux ControlNet Canny (~3.6 GB)
Go to huggingface.co/InstantX/FLUX.1-dev-Controlnet-Canny → Files and versions → download diffusion_pytorch_model.safetensors. The same file works for dev and Krea.
Rename the file — or use the panel's field instead
This guide assumes you rename the file to flux-canny-instantx.safetensors before placing it (in Finder: click once, press Return, type the new name, press Return again) (in Explorer: click once, press F2, type the new name, press Enter). If you'd rather keep the original name, enter it in the ControlNet field under Model Files (Flux) in the panel instead.
Place the file in:
Restart ComfyUI and verify all models are recognized
Restart ComfyUI from Stability Matrix. Open the web interface at 127.0.0.1:8188 and create a new workflow. Add these nodes and check their dropdowns:
① Load Diffusion Model → flux1-dev.safetensors and/or flux1-krea-dev.safetensors
② DualCLIPLoader → t5xxl_fp16.safetensors + clip_l.safetensors
③ Load VAE → ae.safetensors
④ Load ControlNet Model → flux-canny-instantx.safetensors
All four must appear in the dropdowns before proceeding.
Switch to Flux.1 in the RAY-L panel
In Blender, open the RAY-L panel in Render Properties and click Flux.1 in the SDXL / Flux.1 toggle at the top.
The panel adapts: the negative prompt is switched off (Flux.1 doesn't use one), CFG Scale is replaced by Guidance, and a Model Files (Flux) box appears with one field per file — Diffusion (UNet), T5 Encoder, CLIP-L, VAE and ControlNet. Enter the exact filenames you placed in the folders.
To use Krea, change only the Diffusion (UNet) field to flux1-krea-dev.safetensors. Everything else stays the same.
Starting settings — Flux.1 dev:
Start high on ControlNet Strength and lower it if the result looks too locked to the render.
Starting settings — Flux.1 Krea dev:
Settings don't transfer 1:1 from dev. Krea needs more steps — below about 24 it visibly loses quality, above about 35 it gains nothing. For quick iteration, fewer steps and a smaller resolution are fine; judge fine detail such as hands only in the final run at full steps and target resolution.
Model license
Flux.1 dev and Flux.1 Krea dev are published under the FLUX Non-Commercial License. The Model license (commercial use) button in the Model Files box summarizes what that means. RAY-L itself ships no models — the license terms are between you and Black Forest Labs.
Prompting for Flux.1
Flux.1 dev and Krea understand natural language — write full sentences, not keyword lists. No negative prompt is needed.
Unlike SDXL, you do not need RAW photo, 8k uhd, or other quality keywords. Flux.1 generates photorealistic results from descriptive text alone. The same rule as for SDXL applies: no focal length, no angle of view, no camera position — Blender defines those.
Extend the Workflow in ComfyUI
Out of the box, RAY-L uses its own built-in workflows for SDXL and Flux.1 — the panel says Built-in workflow active. But RAY-L works in both directions: anything you can build in ComfyUI can become part of the pipeline you trigger from Blender. An upscaler after the image is generated, an img2img stage with a reference image, any node you need.
The starting point is always an image RAY-L has already generated — it carries the complete workflow inside.
Open a RAY-L result in ComfyUI
Every image RAY-L generates is saved by ComfyUI as a PNG with its workflow embedded. The simplest way to get it: open the image in ComfyUI's web interface and download it — it lands in your Downloads folder. Then drag the PNG onto the ComfyUI canvas. The complete workflow RAY-L sent appears, with all nodes and settings.
All results are also stored in ComfyUI's output folder:
Extend it
Add the nodes you need — for example an upscaler after the image is decoded, or an img2img stage that brings in a reference image. Run it once in ComfyUI to make sure the extended workflow works on its own before you hand it to RAY-L.
Export as API JSON
In ComfyUI, choose Workflow → Export (API) and save the JSON file somewhere you'll find it again — ideally next to your Blender project.
Load it in RAY-L
In the Workflow box at the top of the RAY-L panel, click the folder icon and select the JSON. The panel now shows the filename and External workflow active, and the SDXL / Flux.1 toggle disappears — the model is defined by the workflow now. Click the × next to the filename to switch back to the built-in workflow.
Generate as usual
F12, ① Save as Reference, ② Reference → ComfyUI — nothing changes in daily use. RAY-L finds the nodes it needs to fill by their node type, no manual tagging required: the reference image, the prompts, the seed, the output size and the Canny thresholds. Everything else — model, steps, CFG or Guidance, sampler, ControlNet strength, your added nodes — comes from the JSON and runs as saved. If the workflow has several image outputs, RAY-L brings back the most processed one, e.g. the upscaled image.
What your workflow needs
At least one Load Image node — the first one receives the render from Blender. And a Canny node between it and ControlNet; without one, RAY-L warns you and ControlNet receives the raw render instead of an edge map. Both are already in place if you start from a RAY-L image as described above.
Known limitation — two-stage workflows
RAY-L sets the output size on every Empty Latent Image node in the workflow (and on its Flux counterpart, EmptySD3LatentImage) to the size from your Blender render settings. Workflows that contain more than one of these nodes — for example a two-stage Hires Fix that starts its second pass from a new latent at a different size — therefore don't behave as intended yet. Workflows with a single Empty Latent Image node, and extensions that work on the finished image such as an upscaler after decoding, are not affected. A fix is planned.